The first thing you need is rice
One thing that bothers me immensely is poorly cooked rice. To most people in the United States, rice is some stuff that comes out of a box from the grocery store which somebody’s uncle named Ben put together. It’s a weird mix of rice, possibly a little pasta, some dried our herbs and spices, and is in general all around trash. Due to most American’s lack of knowledge pertaining to rice (and even less so when it comes to Asian varieties of rice) many Asian restaurants in the United States get away with serving all around bad rice. Their regular patrons of course have no idea they are eating bad rice, and the world continues to turn. Well, I’m here to tell you that you don’t have to. Once you learn the proper way to cook rice, and how rice should be in terms of texture, starch levels, and flavor, you too can join me in misery when eating at your local neighborhood Chinese restaurant… or just order it to go, toss away the included container of white rice, and eat your meal with the rice left cooking in the rice cooker at home, while you went to pick up the to-go order.
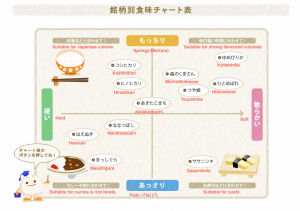
There are many types of rice in the world, and there are many types of rice that can generally be classified as of the Asian variety. However in this particular rant, I’m going to focus on short to medium grain size polished Japanese rice specifically. Within Japan, there are even further classifications of rice broken down by region, by harvest season and time, and by texture – each with a specific purpose; some are best for soaking up curry, some are best for sushi, and some are best eaten with other, strong flavored types of food not considered traditionally Japanese. As an example, this diagram shows different types of Japanese rice, their textures, and what they are best suited for.
In the United States however, we don’t get that granular in our classifications of short – medium grain sized rice. Most of the rice sold in the United States which is marketed as Japanese rice is actually grown in California, and California has excellent soil composition, water, and the general climate required for many different Japanese rice strains to thrive. Rice that was grown or originates in California should not be overlooked as some brands are near indistinguishable when eaten from cooked rice in Japan. Even so, there are many brands of short grain Japanese rice available in the United States, and one of the most widely available brands nation wide that I’ve found to be consistently premium in quality and good for an all-around “utility rice”, is Nishiki rice. 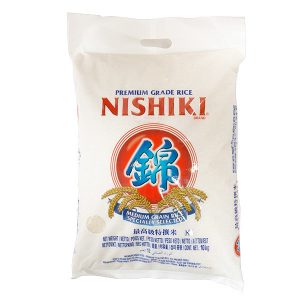
I’ve tried a lot of different brands of short – med grain Japanese rice, and Nishiki is the brand that I’ve settled on for my go-to, general purpose short grain rice. I generally buy it in the 15lb bag size, which I find fit perfectly inside of a plastic 5-gallon paint bucket you can buy new at Lowes or Home Depot. With the lid sealed in the 5 gallon bucket, this rice will stay fresh for a very long time.
The next thing you need is a Rice Cooker
You could master the art of cooking rice on the stove in a regular pot or pan of course, and I wholeheartedly commend anyone who can do so effectively and consistently with short grain rice every time, but for me and about 125 million Japanese people, the rice cooker is the absolute end-all-be-all way to cook rice. There are a ton of rice cookers available out there, ranging in prices of $10 – $1000 USD, and, depending on how serious you want to get with your rice, some of the $250 – $350 rice cookers have features that may be worth the price. For example, Zojirushi’s higher end rice cookers allow you to specify which type of rice is being cooked, and are engineered to use induction heating elements with infrared sensors to detect changes in temperature of the rice throughout the cook process, adjusting temperature and time to achieve what they claim to be perfectly cooked rice. Some rice cookers have options to make rice porridge or congee, and some have modes to cook brown rice as well.


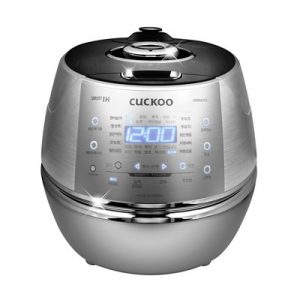
When searching for a rice cooker, there are three main things to look for.
- The lid fits securely. Some rice cookers have fully removable crock-pot style glass lids, others have a hinged lid with a latch that is released by pressing a button. In my experience, the hinged style lids tend to create a more secure seal when cooking rice, and I tend to shy away from the fully removable glass lid styles, but either will work as long as there is a solid rubber gasket along the side of the lid that does not allow any steam to escape while cooking.
- The size. Rice cookers come in different sizes measured in cups, most commonly found in the 1 – 12 cup range. I generally make 3 cups of rice every time I cook rice, which makes enough rice for me to eat over the course of a few days, or enough for a few people during a single meal. It’s good to be able to cook more than 3 cups though, as there have been times where I’ve made 4 or 5 cups for larger groups of people. I’ve never had to make more than 6 cups of rice at a time, and the largest rice cooker I’ve ever owned was a 6 cup machine. Get the size that’s best for you, but consider getting one that’s a few cups larger than you would normally use for those rare instances where you may need to cook more rice.
- Feature sets. Ok, if you’re just getting into rice this one may not matter so much to you, but if you’re upgrading from a single button entry level rice cooker to something a bit more mid-range, you’ll want to look for options such as: porridge mode, softness or hardness settings, quick cook vs extended cook settings, brown rice options (if that’s your thing), inner pot material (stone, metal, etc.), auto-clean modes, stickiness / pressure settings, and options around the keep warm settings to name a few.
That being said, don’t feel as though you need to go out and spend a ton of money on a rice cooker if you’re just getting into rice. A $10 rice cooker from Wal-Mart will more than likely still cook the best rice you’ve ever made. These types of cookers are cheap, simple, and work pretty damn well. They generally work using very simple electronics. There’s typically a temperature sensor which is also integrated with the power switch, and it’s set to go off when a temperature a bit over 212F is reached. This sensor operates the “kill switch” which turns the rice cooker off automatically when the rice is perfectly cooked. How does it know when the rice is perfectly cooked every time, especially when cooking various amounts of rice? When the rice is cooking in the water, the water is boiling but it never really goes above 212F degrees. Once all the water is absorbed by the rice however, the heat which was transferred to, and absorbed by the water, increases. This happens relatively quickly once all the water has been absorbed by the rice, and BAM! The temperature sensor clicks, and the cooker turns off. Perfectly cooked rice. Every time. Just as long as you had the right water to rice ratio when you put the rice in the rice cooker.
Cooking the Rice
Ok, you’ve got your rice, your rice cooker’s all plugged in and ready to go, now what? Remove the internal cooking pot from the rice cooker, and scoop the desired number of level cups of rice into the pot using the measuring cup that came with your rice cooker.
Side Node: Every rice cooker you buy will come with it’s own cup for measuring rice which exactly corresponds to the water level marks inside the rice pot. Don’t loose this cup! Keep it inside your bag of rice so it’s ready to measure rice every time. Often times these cups are not measured to the size of a standard US cup, so if you loose it, figuring out how much rice to add to your rice cooker can be a serious challenge.
Once you’ve measured out your rice, you need to rinse it. The harvesting and milling processes used in making rice, especially if it’s been polished, produces a ton of starch and dust that covers the rice grains. If you were to just measure out 3 cups of rice, fill the interior pot with 3 cups of water, throw it in the rice cooker and set it to cook, your rice cooker would probably start spewing bubbly starch filled water out of it’s vents and lid in much the same way an over-filled pot of unwashed potatoes would if they are brought to a boil. You don’t want this to happen, so you need to rinse the rice before you cook it.
Take the rice pot over to the sink, and turn the water on. Not cold, but not warm either, you want cool water when rinsing the rice. As the water fills the cooking pot with the rice, gently stir the rice around with all five fingers, completely separated, not squeezing or gripping the rice, in a circular motion. Modern milling techniques also somewhat weaken the rice grains, so be careful to have a light touch so you don’t break the grains. Doing so will just produce more starch, and no one wants to eat broken rice. You also want to be quick during this process, as rice absorbs water even if it’s not hot. The goal here is to rinse the rice to remove all excess starch as quickly and as gently as possible. Just allow the water to fill the pot, and continually swish and swirl the rice without pressing or grinding it against anything. You’ll notice as the pot fills with water, that it’s extremely cloudy and opaque, and depending on the type of rice, may look milky. Dump out the water being careful not to dump out any rice, and fill the pot again, constantly swirling your fingers through the rice so that it’s constantly moving as new water washes over it. Fill the pot up, and dump it again. You will want to do this until the water that you dump is pretty much clear, and you can see the rice underneath the water as you dump it out. Typically using 3 cups of Nishiki rice this process takes about 4 or 5 rinses to get clear water.

Once the water is clear, it’s time to fill the pot with the cooking water. Dump out as much water as possible that was used to rinse the rice, and fill the pot to the water level indicated on the inside of the pot, that corresponds with the number of cups of rice you put in the pot. Sometimes pots will have a few different water levels, one for white rice, one for brown, and one for porridge. Find the water level for white rice, and fill it with water for example to the 3 mark if you put in 3 cups of rice. After filling, set the pot on the counter or a level surface and ensure that the water level is right at the correct mark. You don’t want too much water, or the rice will be mushy when it’s done cooking. Also, the type of water used matters when cooking rice. Because the rice absorbs the water, you do not want to use hard water or chlorinated tap water. If possible, use filtered water when filling the pot up to cook.
Next, set the pot in the rice cooker, close the lid securely, and activate the cook function. For some rice cookers this will be a single switch or lever that is pressed down, for other rice cookers this will be a button on an electronic control pad, and for some seriously high end rice cookers, this could be something that is tapped on a touch screen LCD. Either way, put your pot in the rice cooker, and turn it to cook.
Eating the Rice
Once the cooker has clicked, or beeped, or chimed, or told you in it’s Japanese robot voice that the rice is done, one of two things needs to happen depending on your rice cooker.
- If it’s a cheap $10 rice cooker that only has a single switch to turn it on, Leave the lid close and don’t touch it for another 10 minutes. This is to let the rice rest, and re-absorb whatever steam is left in the rice cooker or has accumulated in a certain part of the rice as a whole. Just like how you let a steak sit for 10 minutes to allow even distribution of it’s juices before cutting into it, rice also needs to set for 10 minutes after cooking. After 10 minutes is up, continue to step #2.
- Fluff the rice. Higher end rice cookers that have displays, functions, and more than just a single “ON” button, generally know when the rice is done just like the cheaper rice cooker, but instead of having their power automatically flipped and signifying that the rice is done, the cook process stops, and a 10 minute timer internal to the cooker will start, counting down the time till done. Once the 10 minutes is up, it will beep or let you know the rice is done. Open the lid, and using the spatula that came with your rice cooker, run along the sides of the cooking pot. Then, once the sides have all been separated, gently lift from the bottom and flip or fluff the rice. Don’t mash or press the rice, you want to gently mix and fluff the rice. After all the rice has been fluffed, close the lid and finish preparing the meal until you’re ready to serve the rice. It’s now ready to eat.
You’ll find when eating the rice, that it’s still very sticky and can easily be eaten with chopsticks. In terms of texture, the rice should be soft, with a bit of firmness, almost in the same realm of what you’d consider Al Dente for Italian style pasta, a little bit of “tooth” to it. This rice – Nishiki rice cooked in this manner goes great with Chinese food, Thai curries, Japanese food, Korean food, gumbo, grilled steak, or really any food that requires or could use a short grain white sticky rice.
Most rice cookers also have a “warm” function, where they will maintain a warm but not cooking temperature for a long period of time without sacrificing the quality or texture of the rice. I’ve had rice left on warm for over 24 hours before, and it was still perfectly good when I went to get a scoop the next day. If you do turn your rice cooker off however, leave the rice in there and keep the lid closed. Don’t put it in the fridge! If you put the rice in the fridge, all the moisture will be taken out and you’ll end up with hard, dry, nasty rice. Just leave it in the cooker for a day or two, and you can either re-use the day old rice to make fried rice (fried rice should use day old rice anyway) or if your rice cooker has a “re-heat” function, re-heat it the next day so it’s hot and warm again. I don’t recommend leaving rice in the cooker for longer than three days though without properly heating it through again.